Maximize Email Engagement with eduCRM’s Predictive Sending Feature
How can your institution ensure that your email campaigns consistently land with relevance, engagement, and personalization in your student’s inbox? Enter – predictive email sending.
Announcing Native Cadence SMS Integration
SMS is a powerful and personal way to communicate with your prospects. eduCRM allows you to choose the SMS experience through our native solution or powerful third-party apps like Twilio, WhatsApp, Sakari. We now offer native integration with the Cadence Texting Platform. In addition to having your Cadence Dashboard accessible from any desktop, laptop, or mobile device, eduCRM allows you to add Cadence SMS to your recruitment automation campaigns. With the eduCRM platform and Cadence SMS integration, your recruitment follow-up campaigns can seamlessly combine emails, SMS, and print into a coherent recruitment “conversation” that builds value for your college or university while encouraging students (and their families) to take the next step in the enrollment process. How does it work Build your recruitment automation or engagement campaign, select a Cadence node and enter your account details. When students respond to Cadence SMS messages, their responses will be sent to your Cadence Teams Dashboard for individual follow-up. For more information, contact our support team.
Conditional Content Feature Now Available in the Email Designer
Conditional Content Feature Now Available in the Email Designer Ensuring your students see the most relevant message content leads to higher engagement, enrollment conversion, and yield. At its basic level, the conditional content feature allows you to create one email in multiple versions. Create and send unique Content to different student audiences given their enrollment stage, demographic data, interests, and behavior using a single email. Add an extra level of personalization to display images, offers, or Content based on pre-set conditions. For instance, you could: Display a school or college image depending on a contact’s academic interest Insert a different offer depending on the student’s enrollment stage Change your email’s sender signature based on academic-, student activity-, or athletic-interests Apply “conditions” on the container, structure, or section level and choose to select conditions based on your existing tags. For more information, contact our support team.
Announcing transactional email within automations
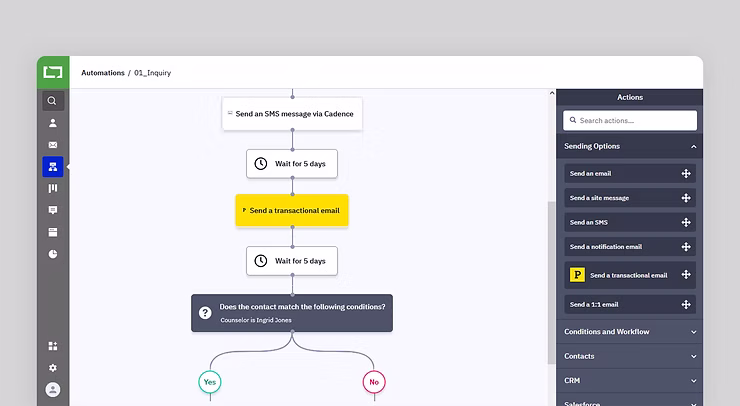
With eduCRM, you can send marketing or transactional emails, triggering emails from a recruitment automation.
New Zapier trigger actions available to bring even more data into eduCRM
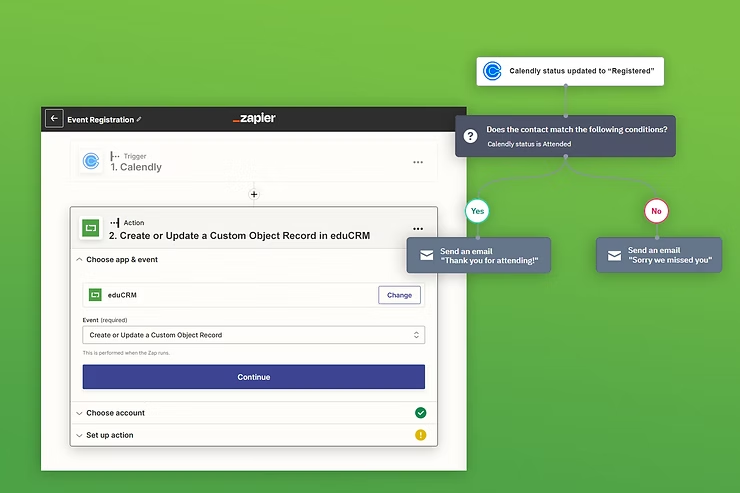
Zapier lets you connect the platform with thousands of popular apps, so you can automate your work and have more time for what matters most.
New Streamlined and Intuitive Navigation | eduCRM
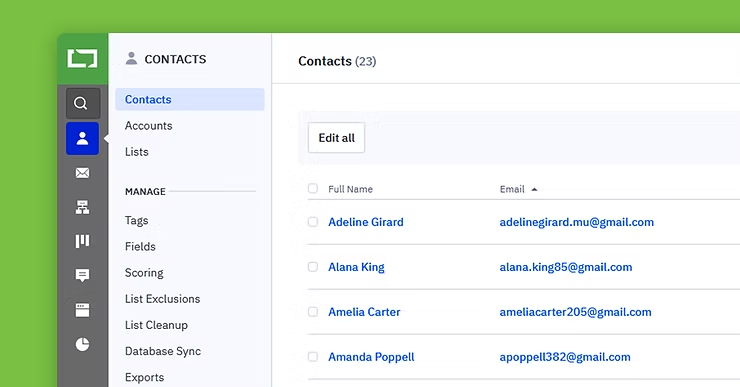
May 2022 Our optimized, streamlined navigation experience in the platform make it: Quicker to navigate around the platform Easier to find related features, settings, and reports Simpler to complete core tasks You’ll also be able to complete many of your most-used tasks in fewer clicks, including: Creating and managing contact lists Configuring and updating feature-specific settings Reviewing and exporting feature-specific reports And more! What’s new? New features grouping We want to make sure your experience is as intuitive as possible. Based on customer feedback, we’re grouping relevant features together such as Lists under the Contact sub-navigation and Tasks under the Deals sub-navigation. Access settings and reports right where you need them The improved left-hand navigation groups related settings and reports into key feature areas like Contacts, Deals, and Website without having to navigate into other areas of the platform. To view related settings and reports, click on any main feature on the navigation bar. Settings will be available under the Manage section, and relevant reports will be available under the Reports section. You can still access the general Settings and Reports pages from the main navigation. Easily collapse and expand the navigation. You can easily collapse the navigation if you need more space on the platform dashboard to complete tasks. To do this, click on the arrow at the top-right corner of the navigation. To expand the navigation bar, click on the same arrow again. Improved readability and accessibility You’ll also notice updated colors and icons, which improve readability and accessibility. For more information, contact our support team.
Logging your recruitment phone calls on the go
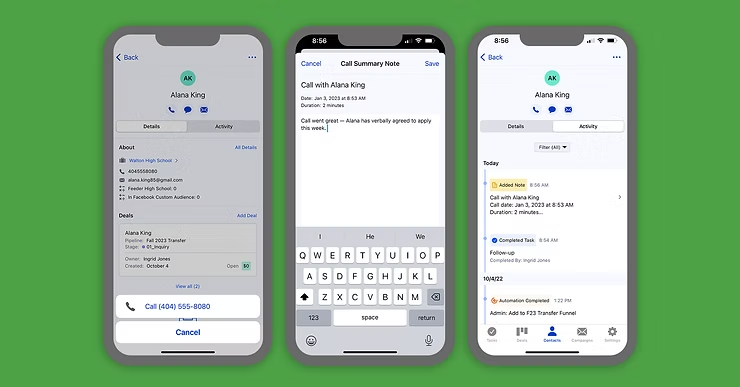
How effective could your recruiters be if they could access student data and make follow-up phone calls on the go? What would that increase in recruitment performance mean to your next entering class? Having a strong game is essential for any new student recruitment effort. High school visits, college fairs, and presentations take your recruitment team on the road and away from their desktops. Effective recruiters are following up by phone, but away from their desks, they face: No easy way to share essential details from the road Disorganized notes that take time to add to your contact records, if at all Details that may be forgotten by the time they’re able to log into your computer Incomplete info that contributes to a poor recruitment experience for your students Equip your recruiters on the go with the new call-logging feature for iOS and Android. Our new call-logging feature lets recruiters call a contact directly from the app and write a summary about the call afterward. How does it work? Select a contact from the mobile app Tap the phone icon under the name of who you want to call After the call is completed, a screen will appear with pre-populated information: The date Time of the call Estimated duration of the call A blank text box allows you to enter a summary of the call — topics discussed, follow-up questions, next steps, concerns, or anything else that will give helpful context. Once you save your summary, it will appear in the contact’s activity tab. A mobile CRM that keeps you connected to your most important data Our mobile app empowers recruiters with the CRM data they need on their phones. Recruiters can manage their entire recruitment pipeline on the go, assign follow-up tasks to the admissions back office, and access and update student and school information. At the same time, enrollment managers gain measurable insight into recruitment effectiveness.
Nurture Stronger Recruitment Relationships with Engagement Tracking for One-to-One Emails
As part of your recruitment automation strategy, automated, one-to-one emails help ensure that every insight is aligned. Your follow-up recruitment automations can deliver a connected recruitment experience, and recruiters can take the conversation to the next level for more engaged students — and yield more enrolled students.
Managing emails details on the go with the Mobile App
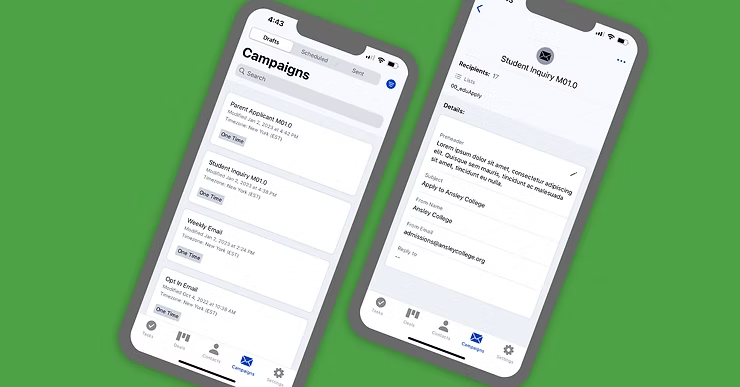
Our mobile app makes it easy to work when (and where) you want, so you get all the essential information. See detailed marketing reports, track your email performance, update your CRM, and quickly find student data on the fly — all from your phone. And with our newest enhancements, you can manage and edit the most important details of your campaigns. Visit your Campaigns tab in the app and click on the edit link in the top bar, and edit your: Subject line Pre-header text From name From email address Reply-to email address Choose any email draft and easily update the listed details from the convenience of your mobile device. You can even send test emails to preview what your contacts will see, so you know you’re providing your students, parents, or constituents the best email experience possible. For more information, contact our support team.
Platform Preview | Using message variables and conditional content

Getting the right message to the right person at the right time is the mantra of one-to-one communication. With eduConverse marketing automation software, our clients are familiar using reusable content tags and dynamic content to tailor communications to the interests of students, parents, and alumni. These features save time in updating campaigns and reusing commonly used content. The new platform release extends these capabilities as message variables (formerly content tags) and conditional content (dynamic content). Let’s explore how this works and the specific use cases for higher education! Message Variables The Message Variables feature allows you to create short, reusable pieces of content to insert into your campaigns and automation emails with a personalization tag. For instance, use Message Variables for: Signatures – Avoid one of the cardinal sins of higher education email marketing and “sign” each email message. Create “signature” variables for recruiters, departmental directors, development officers, faculty, and other administrators. Closings – write typical message closings to direct email recipient follow-up. Majors and certificate programs – develop short descriptions for your college’s academic programs. This extra touch allows you to reference prospective student credential interest. Activities – as with academic majors, create short descriptions for campus life activities. Again, this extra touch adds relevance to your targeted student. Email footers – Use message variables to create targeted email footers—reference why you are contacting the recipient or add departmental contact information. By making changes on the Message Variables page, any update is automatically processed on corresponding messages where the variable is used. For example, if a recruiter position turns over, add the replacement recruiter’s signature and contact information in one place, and all messages are instantly updated! Using Message Variables, you: Save time by not having to re-type commonly used information Reduce errors from manually repeating content Increase efficiency by updating commonly used content in one location Conditional Content Conditional Content allows you to send different information to different contacts using a single email campaign message. For instance, you could: Display a campus image depending upon the alumni’s academic degree. Insert a prospective student’s major interest message variable Send different academic support resource information based upon a student’s mid-term grades. Display different images depending upon if the student is “in-state” or “out of state.” This type of personalization is a way to increase the relevance of your messages for each individual contact without creating different email versions. How does it work? Pretty simply. In the Design step of the campaign creation process, hover over the content block you want to make “conditional.” Click the Gear icon and select Make conditional. Now add the condition(s) to display the selected content block. Summary Combining Message Variables with Conditional Content will improve the relationship with your contacts, increase your open rate, improve your conversion rate, and may improve deliverability. To learn more, visit the Knowledge base and see: How to use Message Variables in emails How do I insert Personalization tags in emails How to use Conditional Content in emails